Introduction
Every dog deserves a comfortable and restful space to call their own. Building your own dog bed is a rewarding and budget-friendly way to provide your furry friend with the ultimate comfort. In this guide, we present 5 beginner-friendly DIY dog bed projects that will have your pooch snoozing in style.
Project #1: Elevated Dog Bed
Materials:
– 4 wooden pallets
– Screws or nails
– Drill or hammer
– Mattress topper
Instructions:
1. Stack two pallets on top of each other.
2. Screw or nail the pallets together.
3. Repeat steps 1-2 to create a second layer.
4. Place the mattress topper on top of the pallets for added comfort.
Benefits:
– Elevated beds promote airflow, reduce heat retention, and support joint health.
– The mattress topper provides extra cushioning and coziness.
Project #2: Cozy Dog Cave
Materials:
– Large cardboard box
– Fabric or fleece material
– Hot glue gun
– Scissors
Instructions:
1. Cut a door into the cardboard box.
2. Cover the outside of the box with fabric or fleece.
3. Glue the fabric or fleece to the box using a hot glue gun.
4. Add a soft blanket or pillow inside for extra comfort.
Benefits:
– Caves provide a sense of security and privacy for dogs.
– The soft fabric or fleece creates a warm and inviting space.
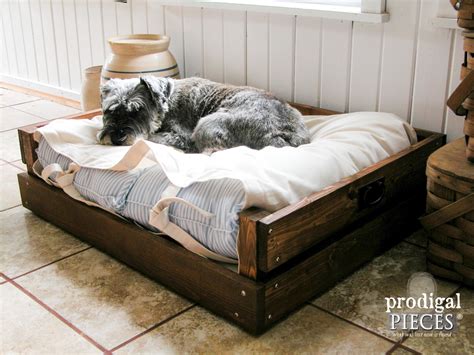
Project #3: Pallet Dog Lounge
Materials:
– 2 wooden pallets
– 2×4 lumber
– Screws or nails
– Drill or hammer
– Foam padding
– Fabric or fleece
Instructions:
1. Measure and cut the 2×4 lumber to create a frame around the pallets.
2. Screw or nail the frame to the pallets.
3. Place foam padding on top of the pallets.
4. Cover the foam padding with fabric or fleece.
Benefits:
– Pallet lounges are sturdy and durable, providing long-lasting comfort.
– The foam padding creates a soft and supportive sleep surface.
Project #4: Upcycled Tire Dog Bed
Materials:
– Old tire
– Plywood or MDF board
– Screws or nails
– Drill or hammer
– Foam padding
– Fabric or fleece
Instructions:
1. Clean the old tire.
2. Cut a circle of plywood or MDF board to fit inside the tire.
3. Screw or nail the plywood or MDF board to the tire.
4. Place foam padding on top of the plywood or MDF board.
5. Cover the foam padding with fabric or fleece.
Benefits:
– Upcycled tire beds are eco-friendly and cost-effective.
– The tire provides a unique and playful touch to your décor.
Project #5: Personalized Dog Pillow
Materials:
– Fabric of your choice
– Sewing machine or needle and thread
– Stuffing
– Scissors
Instructions:
1. Cut two pieces of fabric into rectangles or squares.
2. Sew or stitch the edges of the fabric together, leaving an opening for stuffing.
3. Turn the pillowcase right side out.
4. Fill the pillowcase with stuffing.
5. Sew or stitch the opening closed.
Benefits:
– Personalized dog pillows allow you to add a touch of style to your home décor.
– You can choose fabrics and colors that match your dog’s personality and style.
Conclusion
Building your own dog bed is a fun and rewarding way to provide your furry friend with a comfortable and restful space. These beginner-friendly DIY projects offer a variety of options to suit your dog’s needs and preferences. With a little effort and creativity, you can create a cozy and stylish dog bed that will be a cherished addition to your home.