Overview
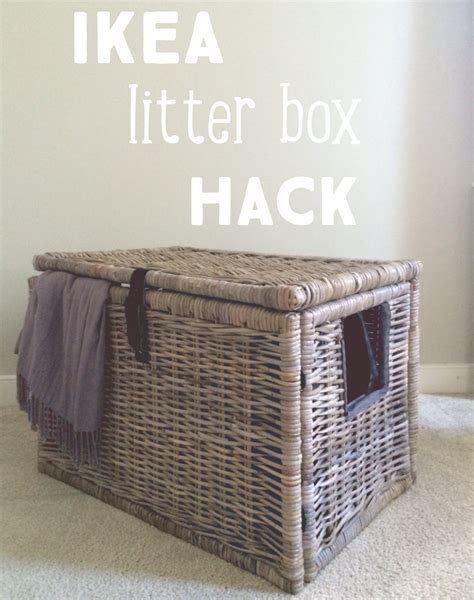
Litter box enclosures are essential for maintaining a clean and odor-free home while providing privacy for your furry friend. Instead of purchasing an enclosure, why not embark on an exciting DIY project? This comprehensive guide will empower you with step-by-step instructions, creative ideas, and practical tips to create a cozy and stylish litter box enclosure that suits your pet’s needs and your home décor.
Why DIY?
- Cost-effective: Pre-made enclosures can be expensive, especially for larger pets or custom designs. By building your own, you can save a significant amount of money.
- Personalized: You can customize the enclosure to match your décor, your pet’s personality, and the available space.
- Quality control: You have complete control over the materials and construction methods used, ensuring the highest quality and durability.
Materials and Tools
Materials:
- Wood (plywood, MDF, or repurposed lumber)
- Fabric (for curtains or a privacy screen)
- Hardware (hinges, door handles, screws)
- Paint or stain (optional)
Tools:
- Saw
- Drill
- Measuring tape
- Pencil or chalk
- Screwdriver or drill driver
- Sandpaper or orbital sander
- Level
Step-by-Step Instructions
1. Determine the Enclosure Size
Measure your litter box and add approximately 6 inches of space on each side for your pet’s comfort and easy access. Determine the overall height based on your pet’s height and the desired level of privacy.
2. Cut the Wood
Cut the wood pieces to the desired dimensions for the sides, top, bottom, and door. Use a saw or a miter saw for precise cuts.
3. Assemble the Sides
Attach the side panels to the bottom using wood glue and screws. Ensure that the corners are square and the sides are level.
4. Install the Top and Bottom
Secure the top and bottom pieces to the completed side frames. Again, use wood glue and screws for a strong bond.
5. Build the Door
Cut the door to fit the opening in the front of the enclosure. Attach hinges to the inside of the door and the frame. Ensure that the door opens and closes smoothly.
6. Finishing Touches
Sand any rough edges or splinters. Apply paint or stain to the enclosure if desired. Install a privacy screen or curtains to the inside of the door for added seclusion.
Creative Design Ideas
Shape: Experiment with different shapes, such as rectangular, square, L-shaped, or even triangular enclosures.
Size: Consider building an extra-large enclosure for multi-cat households or pets who prefer more space.
Materials: Use reclaimed wood, bamboo, or cork for a sustainable and stylish touch.
Curtains: Choose curtains with playful patterns or colors that complement your décor.
Customization: Add shelves, drawers, or hooks to the enclosure for storage or decoration.
Practical Tips
- Ventilation: Ensure that the enclosure is well-ventilated to prevent odors from accumulating.
- Accessibility: Place the enclosure in a location that is easily accessible for your pet.
- Cleaning: Design the enclosure with a removable tray for easy cleaning.
- Oversized Enclosure: If building a large enclosure, consider adding a removable divider to create smaller sections.
- Safety Precautions: Secure the enclosure firmly to prevent it from tipping over.
FAQs
- What is the best material to use? Plywood, MDF, and repurposed lumber are all suitable options.
- How large should the enclosure be? Add approximately 6 inches of space on each side of your litter box.
- Can I use curtains instead of a door? Yes, curtains provide privacy and easy access.
- How do I clean the enclosure? Use a vacuum cleaner or a damp cloth to remove debris and odors.
- My pet is large. What size enclosure should I build? Consider an extra-large enclosure or adding a removable divider for smaller pets.
Reviews
- “I built a DIY litter box enclosure for my cat, and it’s been a game-changer! It’s a private and comfortable space for him, and it keeps the litter and odors contained.” – Emily, cat owner
- “I was hesitant about building my own enclosure, but it was surprisingly easy. The step-by-step instructions made it a breeze, and now I have a beautiful and functional addition to my home.” – Sarah, dog owner
- “I love that I can customize my enclosure to match my décor. It’s a stylish and practical solution that makes life easier for both me and my pet.” – Jessica, rabbit owner
- “I’m so glad I decided to DIY my litter box enclosure. It’s saved me money, kept my home clean, and given my pet the privacy it needs.” – Matthew, bird owner
Case Comparison
Pre-made Litter Box Enclosure:
- Average cost: $50-$200
- Limited design options
- May not be the optimal size or shape for your needs
DIY Litter Box Enclosure:
- Average cost: $20-$50
- Customizable design and materials
- Perfectly sized and shaped for your pet’s needs
Conclusion
A DIY litter box enclosure is a cost-effective, personalized, and practical solution that enhances your home environment and provides a comfortable and private space for your furry friend. With the step-by-step instructions, creative design ideas, and practical tips provided in this guide, you can embark on an exciting DIY project and create a litter box enclosure that meets your pet’s needs and your own style.
Appendix
Table 1: Materials and Costs
| Material | Estimated Cost |
|---|---|
| Plywood or MDF | $20-$50 |
| Fabric | $10-$30 |
| Hinges and Hardware | $10-$20 |
| Paint or Stain (Optional) | $10-$20 |
Table 2: Recommended Enclosure Sizes
| Pet Type | Enclosure Dimensions |
|---|---|
| Cat | 24″ x 18″ x 24″ |
| Dog (Small) | 30″ x 24″ x 24″ |
| Dog (Medium) | 36″ x 30″ x 30″ |
| Dog (Large) | 42″ x 36″ x 36″ |
Table 3: Tips for Ventilation
- Install a fan or ventilator in the enclosure.
- Use a perforated lid for the litter box.
- Leave a small gap between the bottom of the enclosure and the floor.
Table 4: Cleaning Schedule
| Task | Frequency |
|---|---|
| Vacuum or Sweep | Daily |
| Clean Litter Box | Twice a Week |
| Wipe Down Enclosure | Monthly |
| Deep Clean Enclosure | Every 6 Months |